How to Draw a Goldfish (Easy Step by Step Guide)
This tutorial shows how to draw a goldfish with easy to follow steps, beginner-friendly illustrated examples, and basic instructions.
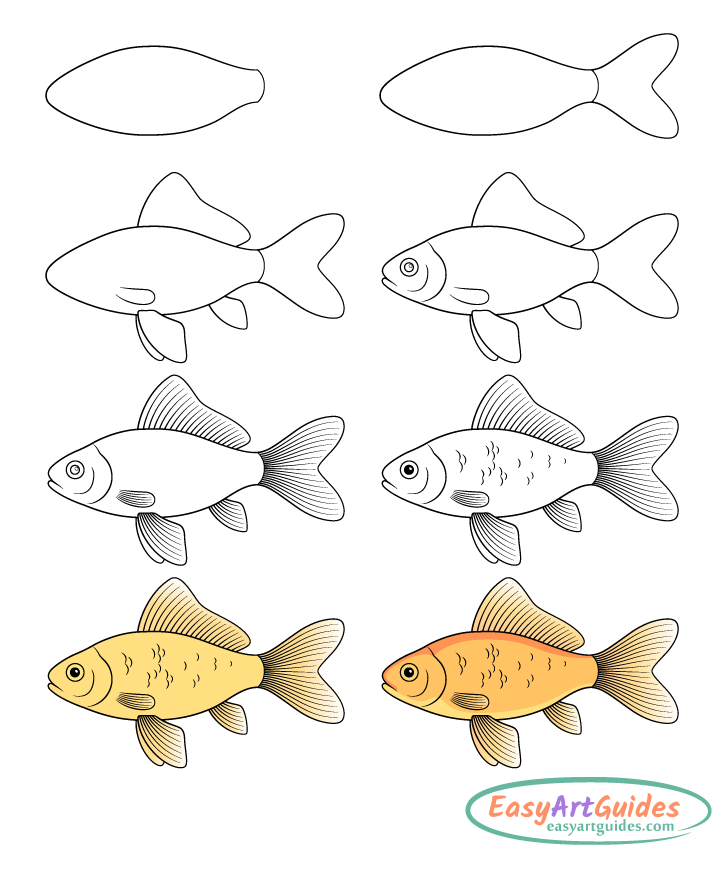
In this case, the goldfish is drawn from the side view in a semi-realistic style where some of the animal’s details are either simplified or omitted. The art is done with black outlines, flat colors and basic gradients.
The guide provides an easy-to-follow, step-by-step breakdown of the drawing process where the subject is gradually built up from its larger shapes down to the smaller details. The overall goal is to create a drawing that captures the goldfish’s most characteristic features and is easily recognizable.
Because these examples require erasing at certain stages, you should start the drawing in pencil, unless you are working digitally. Keep your lines light until you have fully defined the goldfish with all of its details. You can then trace over the drawing with a fine-line black marker.
Recommended Materials for This Goldfish Drawing
- HB Pencil: A regular pencil for creating the initial line drawing.
- Eraser: For erasing parts of the drawing when adding the head and fins, and correcting mistakes.
- Paper: White paper.
- Black Fine-Line Marker: For getting thin, black outlines like those in the examples.
- Colored Pencils (recommended): An easy option for coloring the goldfish drawing and for creating the gradients along its fins.
- Drawing Tablet & Software (alternative): A digital option that allows you to easily create black outlines, solid colors, and gradients.
Step 1 – Outline the Body of the Goldfish
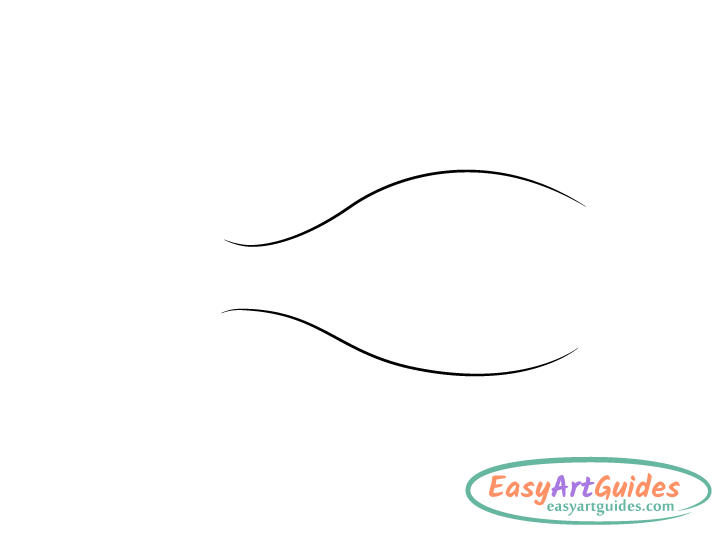
Start the drawing with a simplified outline of the overall shape of the goldfish’s body, without the fins. Make it wider near the middle and narrower toward the front and back. At the very back of the outline, add a short, tapered area that the tail fin is connected to.
Step 2 – Draw the Tail
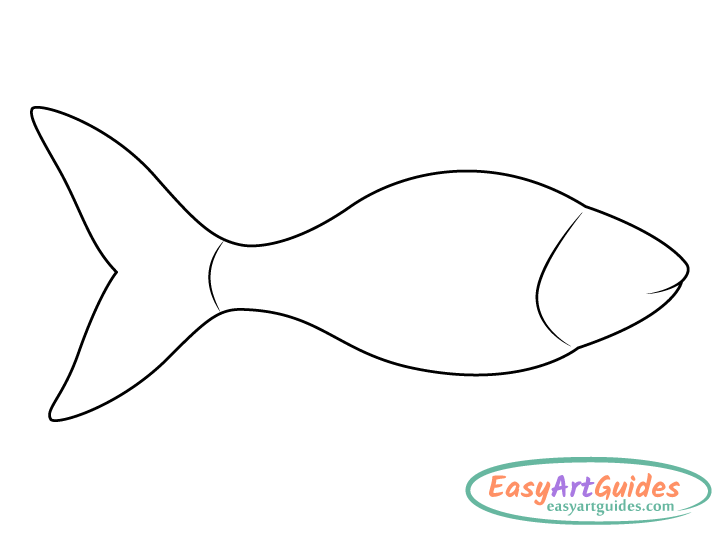
Draw the tail (the caudal fin) at the back of the goldfish. Give it a forked fan-like shape, one that gets wider as it goes out with a split down the middle.
Step 3 – Draw the Fins
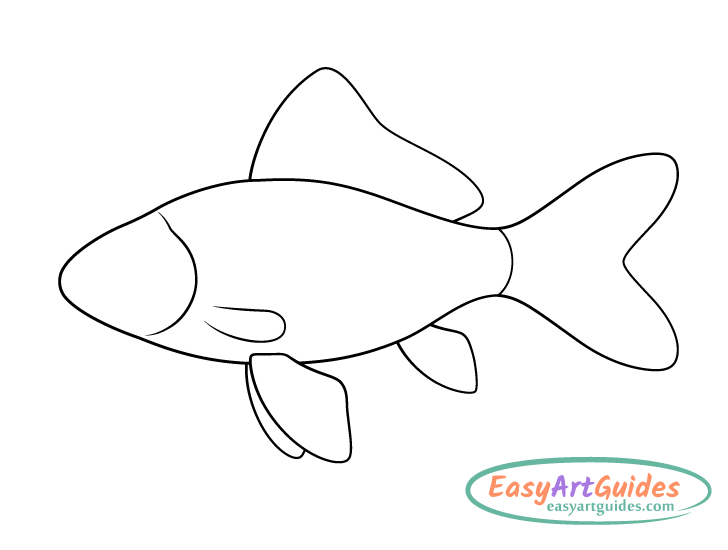
Add the goldfish’s fins as follows:
- Back Fin: Draw the large fin along the top of the goldfish (the dorsal fin) curving slightly backward. Make it taller at the front with a downward slope past its peak. Transition this into a fairly smooth downward curve that tapers toward the body as it runs toward the back. Its rear tip should reach almost all the way to the base of the tail.
- Belly Fins: Draw the first fin along the belly (the pelvic fin) curving backward and getting wider as it goes away from the body. Its overall shape should look a bit like a triangle with rounded corners. You will need to erase a small section of the body’s outline when adding it. Draw the fin in the background partially peeking out from behind the first one.
- Rear-Bottom Fin: Draw the rear-bottom fin (the cloacal fin) with a shape similar to the pelvic fin.
- Side Fin: Draw the fin along the side of the body (the pectoral fin) with a light curve to its overall shape. Make it wider as it extends outward and give it a rounded end.
For drawing other kinds of fins, see:
How to Draw a Dolphin Step by Step
Step 4 – Define the Head and Facial Features
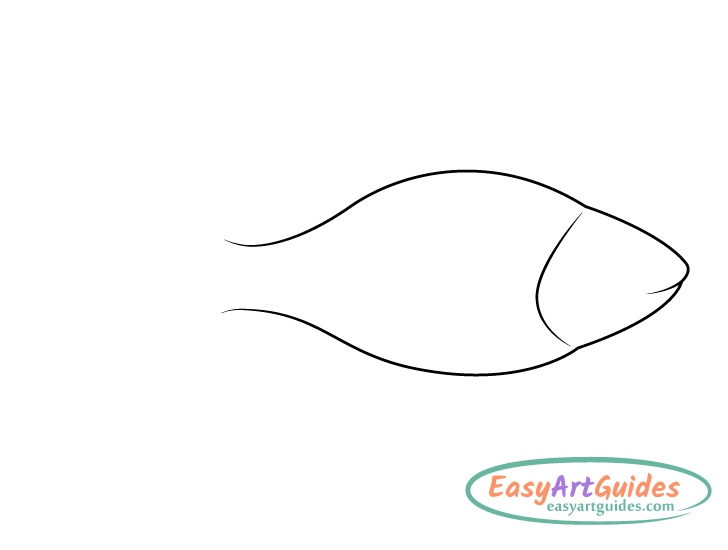
Define the area where the body transitions into the head by first outlining the gill flap. Draw this as a curve with a tiny forward dip near its upper end. Also, make the goldfish’s overall outline a little narrower at the head-to-body transition points, like it has been pinched. To do so, erase parts of the initial outline in those areas and redraw them with small inward curves.
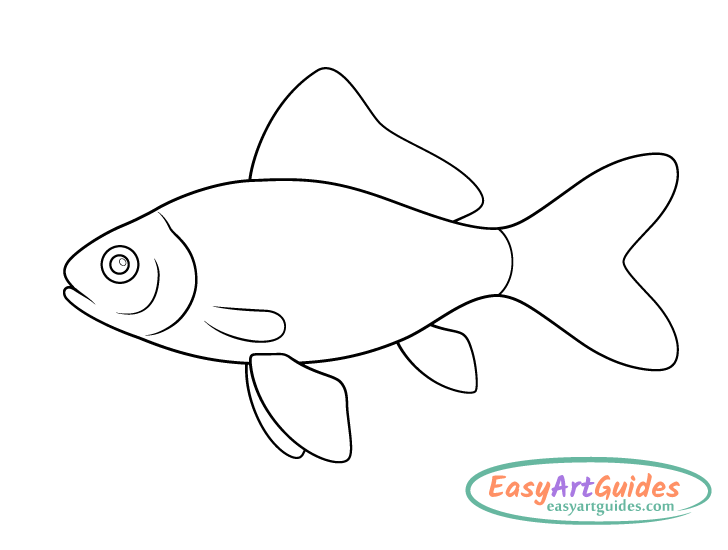
Once you have the outline of the head, add the facial features.
- Eye: Make the eye round and draw another smaller circle inside it to define the pupil. Inside the pupil, draw a small oval-shaped highlight to show light reflecting from its particularly smooth surface.
- Mouth: Erase a small part of the outline from Step 1, and add the mouth. Draw its opening with a downward slope.
Step 5 – Draw the Fin Rays and Spines
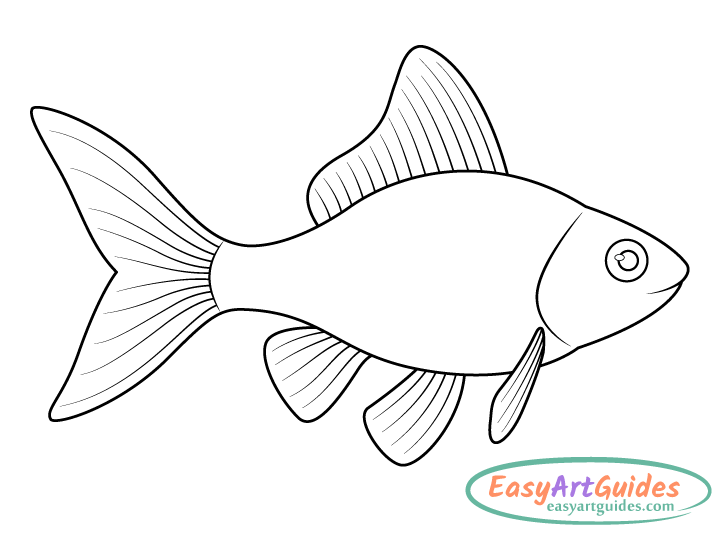
Draw the spines and rays on the fins. These are the small bones that are visible because the fins and tail are semi-transparent. Show these as curved lines that fan out along each fin’s shape as they extend from the base.
Step 6 – Draw the Scales
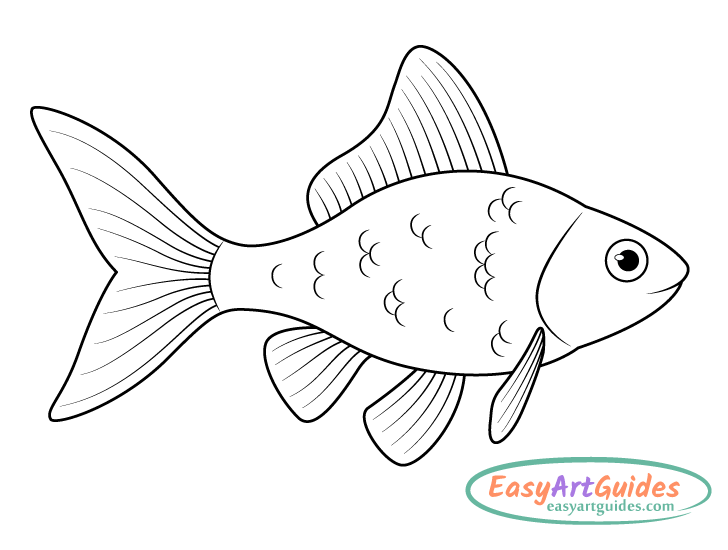
Create a hint of scales by drawing curved lines along the goldfish’s body. Position some in stacks and a few on their own (as shown in the example).
After drawing the scales, go over your lines with either a fine-line black marker, or darken them with the pencil. Afterward, also fill in the pupil of the eye with either black or dark pencil shading.
Step 7 – Apply the Base Color
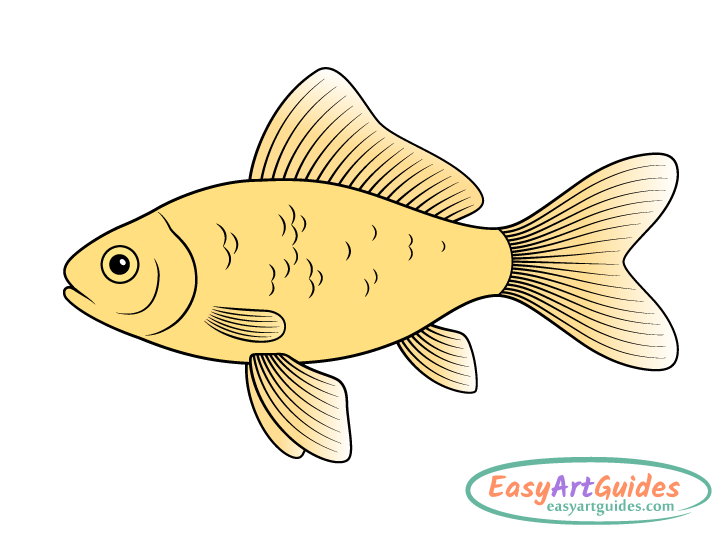
To color the goldfish, colored pencils are a good and easy-to-use option. begin by applying an initial layer of color as described below.
- Body: Fill in the outline of the goldfish’s body with a solid, flat yellow.
- Fins: Create a gradient along the fins, going from yellow at the base to white at their outer ends.
Step 8 – Add Secondary Color Layer
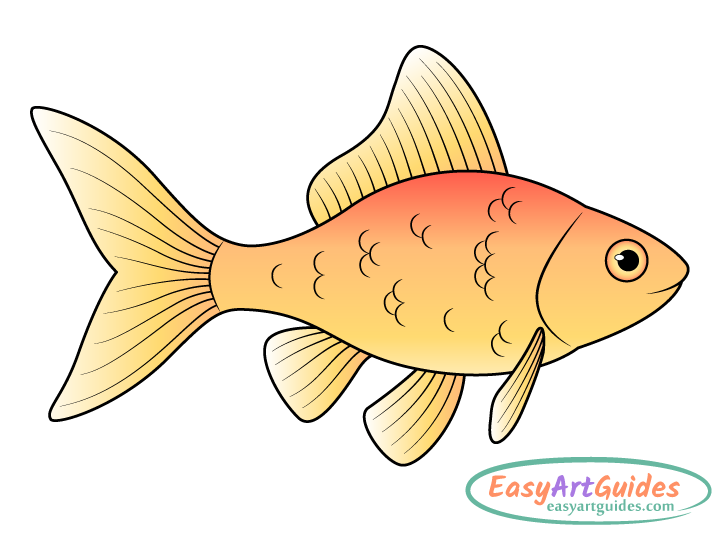
Apply another layer of color as follows:
- Body: Go over the goldfish’s body with orange, leaving only the belly yellow. Next, add a darker orange area along its back and head that curves into the upper end of the mouth. You can create these color variations by applying more or less pressure to an orange pencil.
- Fins: Blend a bit of orange around the base of each fin.
Conclusion
This guide shows how to create a semi-realistic artwork of a goldfish with black outlines, flat colors, and basic gradients. It demonstrates a step-by-step approach, where you gradually build up the subject starting from its larger shapes and work down to the smaller details.
Hopefully, you’ve found the guide helpful and easy to follow.
For more similar step-by-step tutorials, also see: