How to Draw an Ice Cream Like a Pro (4 Easy Steps)
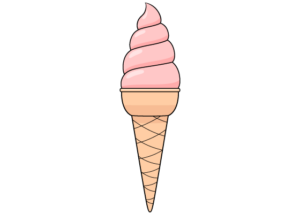
This guide shows how to draw an ice cream step by step. The example is of one with a twist shape served in a cone.
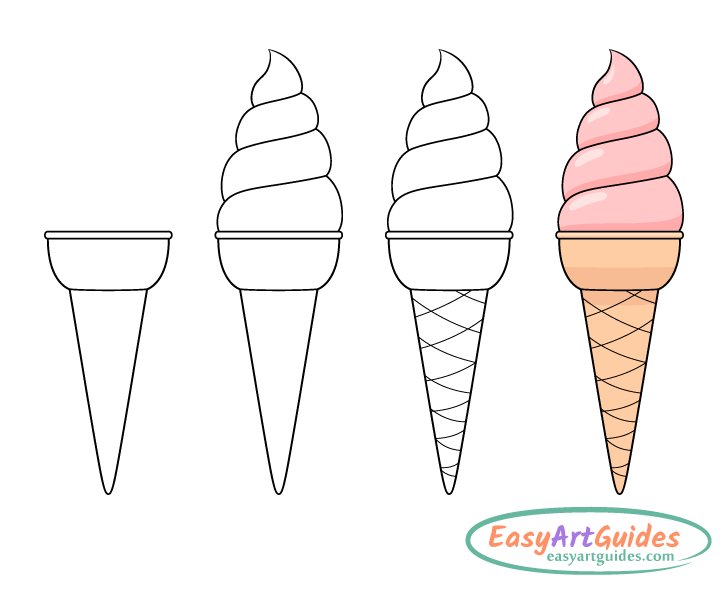
The guide shows how to create the ice cream drawing in a very easy to understand, beginner friendly way. It does so by employing a method used by professional artists where the subject is first structured and proportioned using some basic guide lines, the smaller details are added afterwards.
The tutorial starts by showing how to structure the main shape of the cone, followed by the twist of the ice cream. It then illustrates how to add a simplified waffle pattern and how to apply some basic color and shading to the drawing. You can see the main stages of the drawing in the preview image above. However, much more detailed examples with all of the guide lines are shown below.
The examples have black outlines and the guide lines that you should erase are shown in blue. However, if you are going be following along drawing on paper, it’s recommended that you start in regular pencil. Keep your lines fairly light so that they don’t leave marks when erased. If you wish, you can trace over them with a thin black marker once you’ve defined all parts of the ice cream.
Step 1 – Draw the Ice Cream Cone
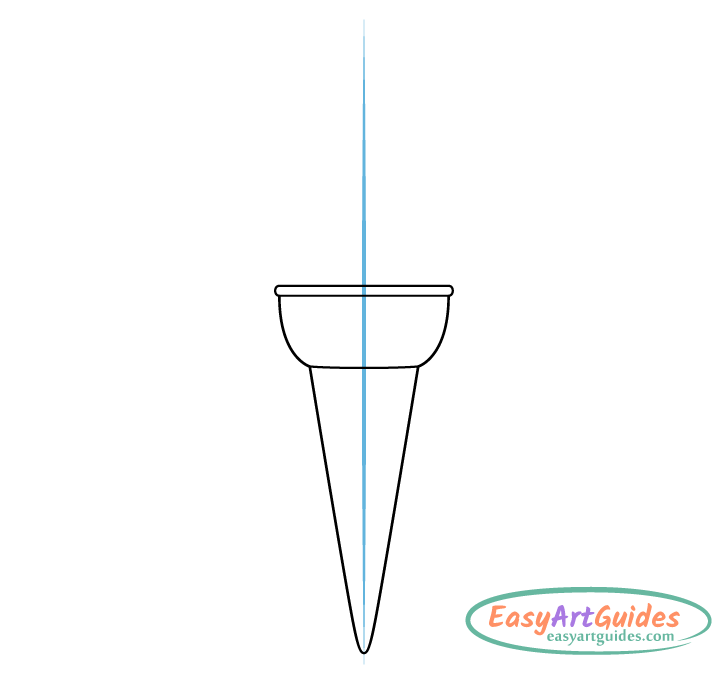
Start the ice cream drawing by outlining the cone. However, before drawing the cone itself, make a straight vertical line though the middle of the middle of your page or the areas where you wish to position it. This line can help insure that the drawing does not become skewed to one side. It can also make it easier to see if both halves of the ice cream’s outline are relatively even in width.
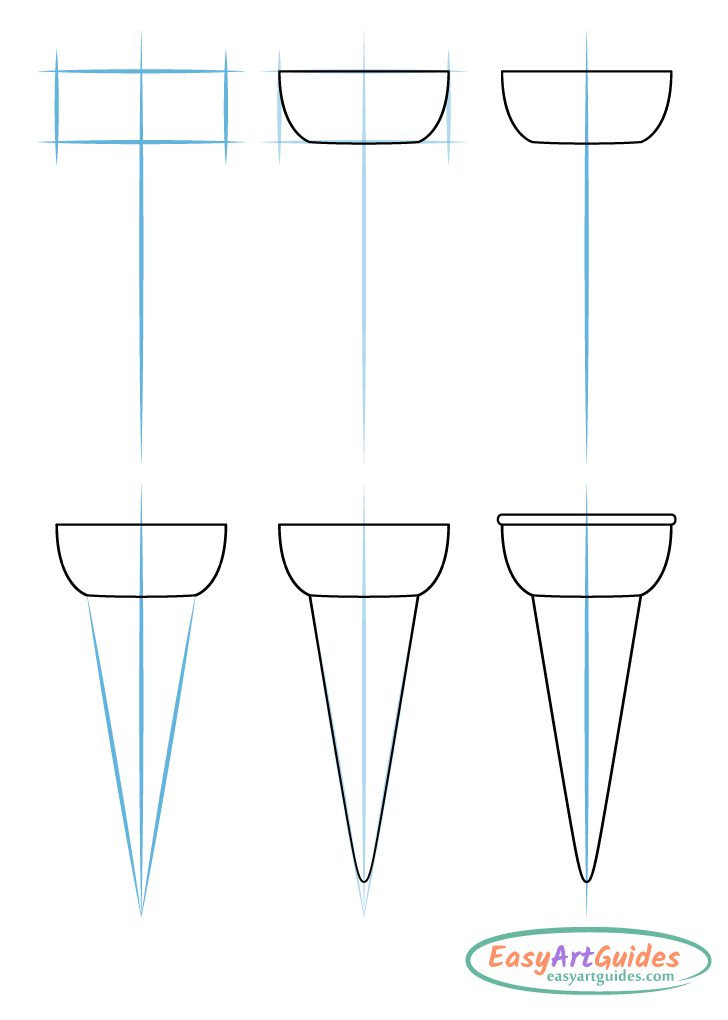
First, define the cone’s upper part. At first, draw this as a simple rectangle (to get it’s overall height and width). Position it roughly in the middle of the guide line (vertically). Inside the rectangle draw the outline of the actual “bowl”. Give it a flat top and a very slightly rounded bottom. Draw the sides curving inwards as they run down. Afterwards, you can erase the extra lines that defined the rectangle.
The reason the bow’s top is drawn flat and the bottom slightly rounded it to account for “eye level”. The drawing is done as though the top of the cone is exactly at the level of the viewer’s eyes (as though you are holding it in front of you). This makes the otherwise round opening simply look like a straight line. The bottom of the bowl is slightly lower down allowing the viewer to see some of it’s curvature.
Below the “bowl” add the cone. Make this section fairly long and start by simply defining it with a pair of straight angled lines that join at the bottom. Next, slightly round off the cone’s bottom tip and erase the parts of the initial line set that run past it.
Finally, to finish the ice cream cone’s outline draw the rim on top. Make it’s outline quite narrow with a straight top and rounded sides.
For drawing other baked goods see:
- How to Draw a Croissant Step by Step
- How to Draw a Cracker Step by Step
- How to Draw a Baguette (French Bread) Step by Step
Step 2 – Draw the Ice Cream’s Twist
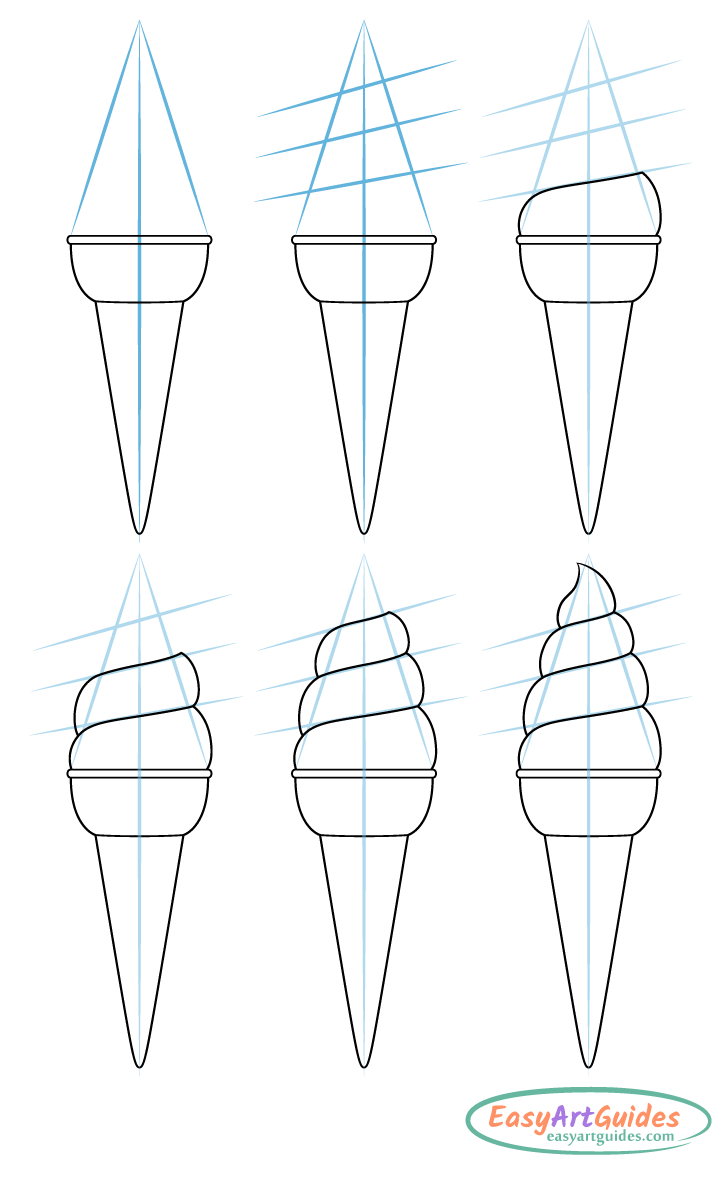
Drawing an ice cream with a twist shape can be a bit of a challenge, however, you can simplify the process by following the example above. First, draw a simple cone and then proportion the twist sections using several angled lines. In this case there are four of them (but you can draw more if you like). Make each consecutive section slightly less tall as the twist goes upwards. The only exception to this is the upper tip. This can be taller than the rest. the Draw the lines that define these sections slightly fanning out (getting farther apart) as they go upwards.
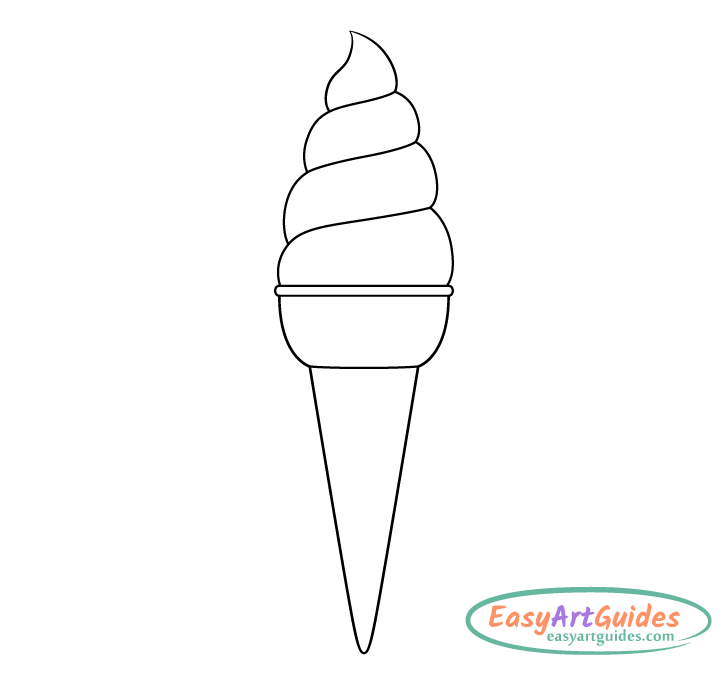
Once you have all parts of the twist defined, erase all of the guide lines so that you have a clean outline of the ice cream.
For drawing other kinds of sweets see:
How to Draw Candies & Sweets (10 Ways)
Step 3 – Draw the Waffle Pattern
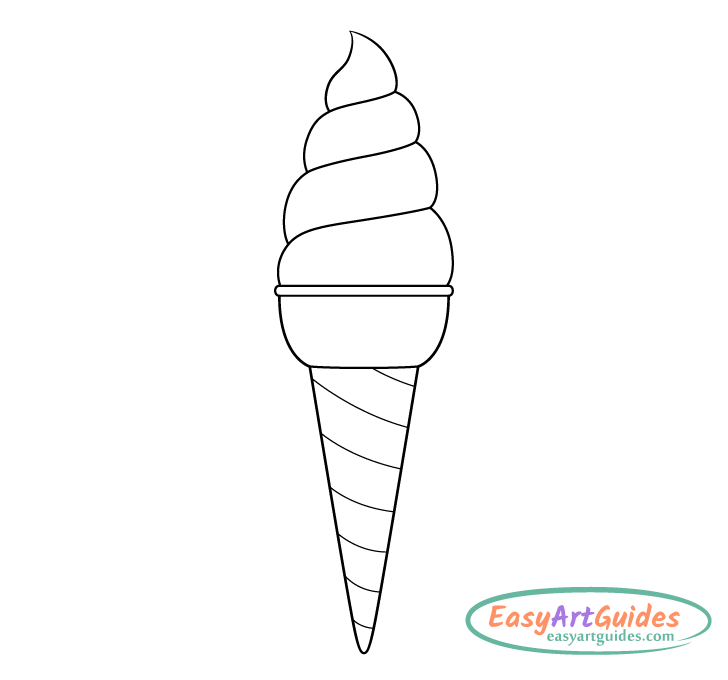
For the last part of the line drawing add the waffle pattern. In this case it’s highly simplified with just enough lines added to show that it’s there.
When adding the pattern lines try and space them fairly evenly apart from one another. Start from the top of the cone and draw them to be progressively more curved as they go towards the bottom (again the account for eye level).
First, fully a draw out a set running in one direction.
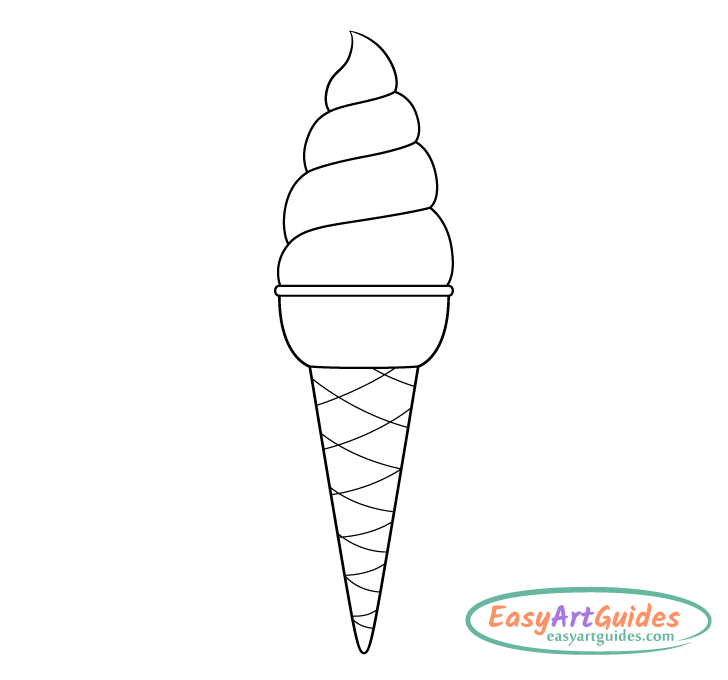
Next, draw the second set overlapping the first one.
Once you are done with the above, you can trace over your drawing with darker pencil lines or a thin black marker.
Step 4 – Color the Ice Cream
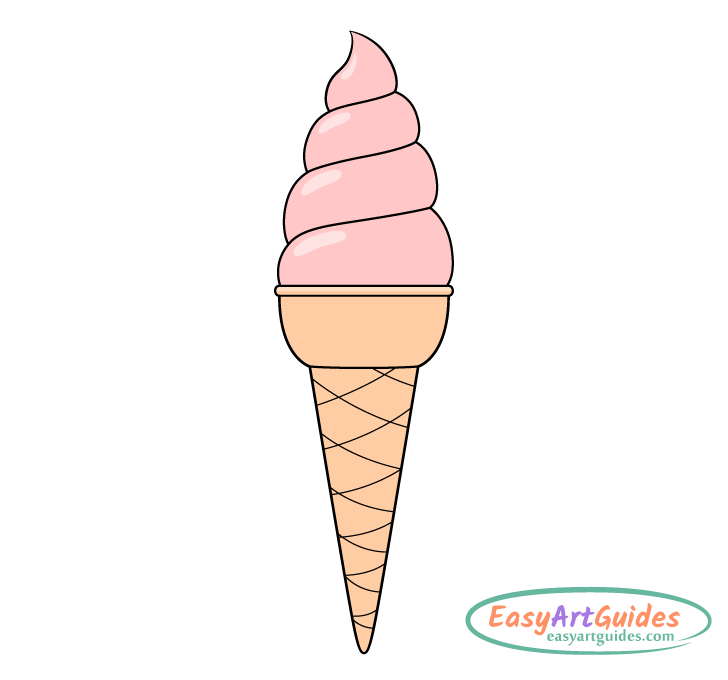
To color the drawing make the ice cream itself any color you like (in this example it’s pink so that it looks like strawberry flavor). However, leave a series of white spots running along one of it’s sides (one per section). These will show reflections and will help make the twist look moist like is starting to slightly melt (as ice cream often does). It will also help convey that the ice cream has a smooth overall texture.
For drawing an actual strawberry and other types of berries see:
- How to Draw a Strawberry in 4 Simple Steps
- How to Draw Blueberries in 6 Steps
- How to Draw Cranberries (8 Simple Steps)
Color the cone a solid orange yellow brown. An easy way to create this is by applying these colors in layers using pencil crayons or by mixing the appropriate color paints. Unlike the twist, the cone does not need any reflections. This will help give it more “matte” look.
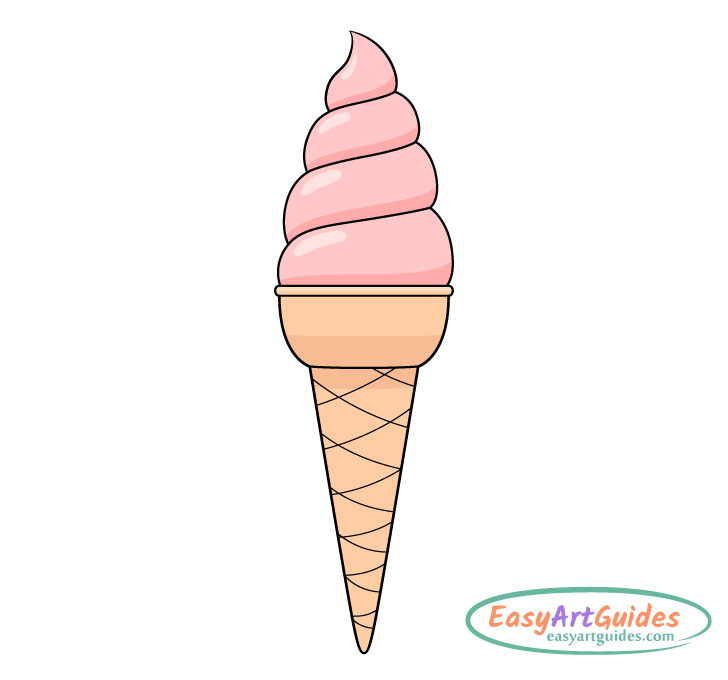
After applying the colors also add a bit of shading. This will help give the drawing a more three dimensional appearance.
In this case the ice cream is shaded as though most of the light is coming from above and just slightly to the left. In such a setup the shadows will be cast downwards. To show this darken the following areas:
- The bottom of every section of the twist
- The lower area of the cone’s “bowl” section
- The area below the “bowl” section
The shadows along the twist are created as the thicker middle areas of it’s sections blocks some of the light from reaching the lower narrower areas (sort of like an umbrella).
The dark area along the lower part of the bowl and cone is created in the same way. The bowl’s thicker top blocks some of the light from reaching the thinner areas below.
Conclusion
This guide shows how to draw an ice cream cone in a beginner friendly yet professional manner. It’s designed to both be simple and teach good drawing practices.
As was shown throughout the steps, you can fairly quickly and easily structure the various parts of an ice cream cone using some very basic guide lines. You can then use these lines to help create a more organic drawing.
The guide also shows how position light and dark areas along the ice cream when coloring and shading. Doing so properly can help give your artwork a more three dimensional appearance and to help convey the texture of the various parts of your subject.
Hopefully you’ve found the guide to be both fun and informative. For more drawing tutorials done in a similar art style also see: