How to Draw Fries (6 Easy Steps)
This tutorial shows how to draw fries (French fries) in a box. It does so in six steps that provide simple illustrated examples.
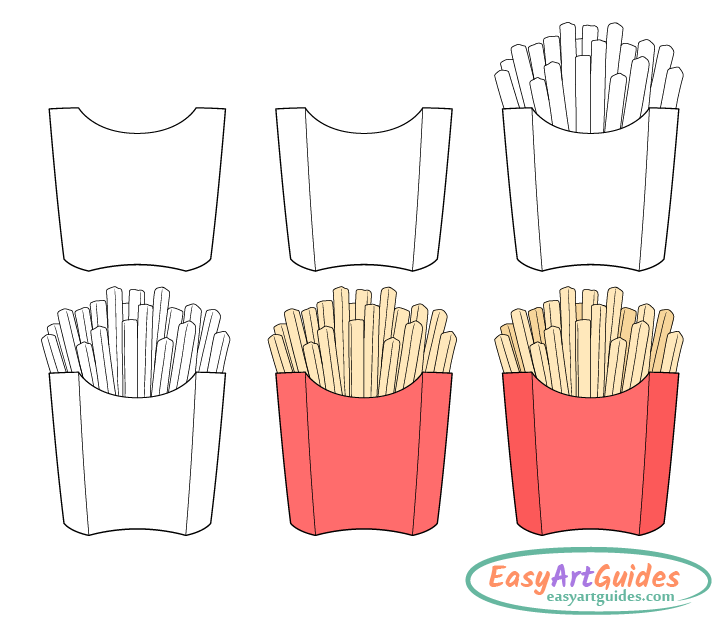
The art is of traditional-looking potato fries cut into strips that are sticking out of a box. The guide first shows how to make a line drawing of the container followed by the fries. The last two steps demonstrate how to apply some color and basic shading to the artwork.
It’s recommended that you start the drawing in pencil and keep your lines fairly light until you have the fries and container fully defined. Light lines are generally easier to erase in case you need to correct a mistake or make adjustments to the drawing. You can darken them before coloring.
Recommended Materials for French Fries Drawing
- HB Pencil: A regular pencil for creating the initial line drawing.
- Eraser: For correcting potential mistakes.
- Paper: White paper.
- Black Marker: For tracing over the initial lines to get black outlines like those in the examples.
- Colored Pencils (recommended): An easy option for coloring the fries drawing.
- Drawing Tablet & Software (alternative): A digital option that allows you to easily create black outlines and apply solid color fills.
Step 1 – Draw the Outline of the Fries Box
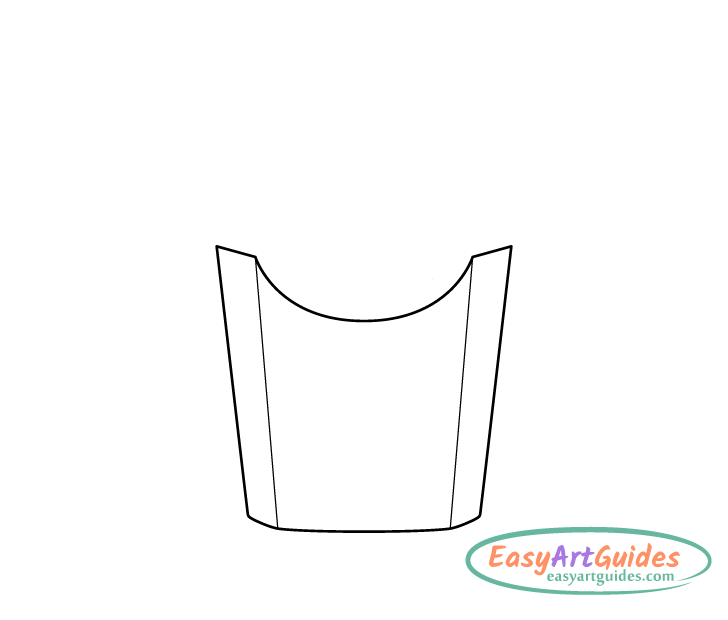
As mentioned, start by drawing the fries box/container.
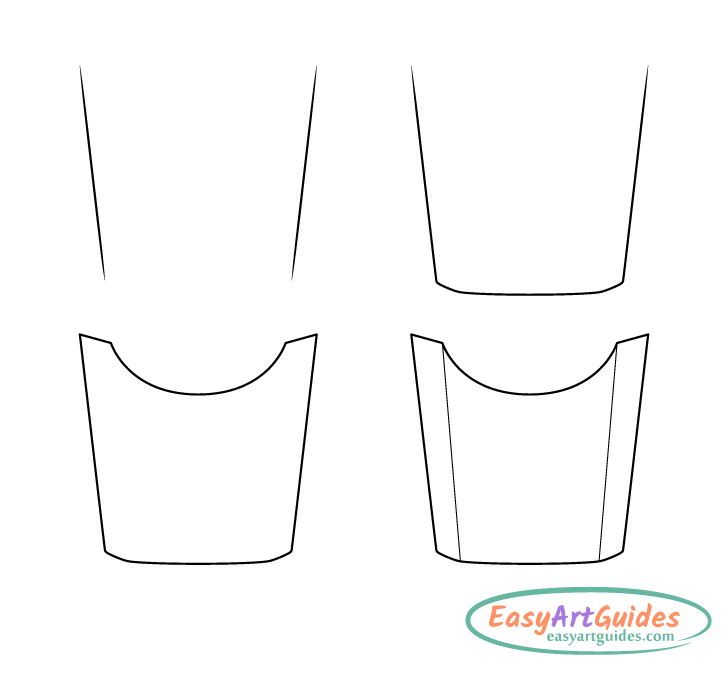
First, outline its overall shape. Start with the sides, which you can define using a pair of lines. Draw these in a way where the box gets wider towards the top. Next, draw the bottom. Make this very slightly rounded with bends on the sides. Finally, draw the top. Make its side areas angled and draw the section in between them as a downwards arc.
After you have the box’s main shape outlined, draw the edges of the folds running between the sides of the arc and the inner corners of the bends at the bottom.
Step 2 – Draw the Outlines of the Fries
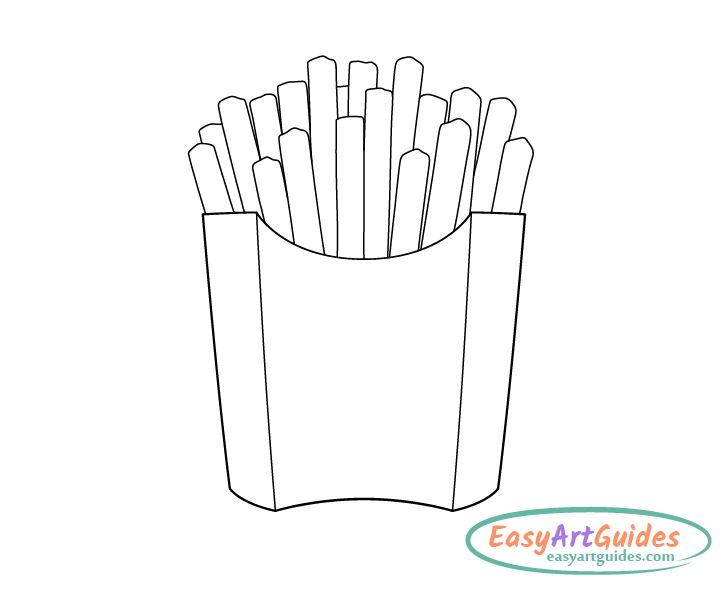
After drawing the box, draw the fries sticking out of it. Similar to the box, start with their overall outlines. As mentioned, in this example, the fries are cut into strips. Draw each of these to be slightly curved.
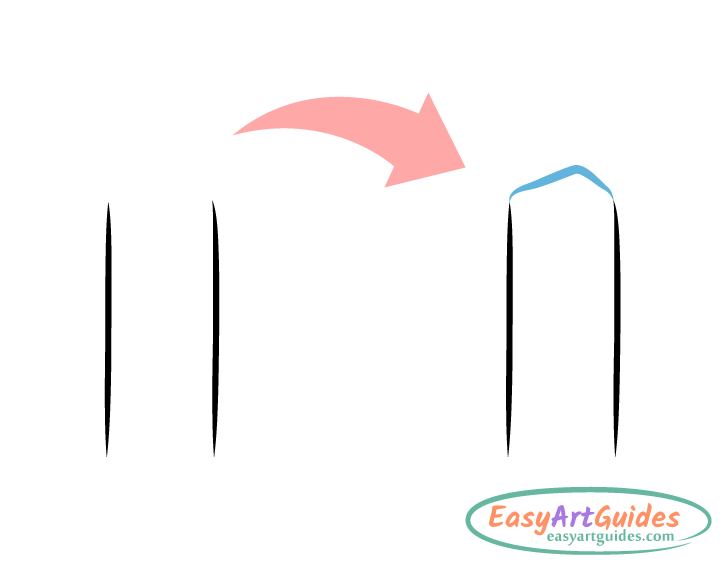
Also, give each one a roof-like shape on top but draw some of these “roofs” to be tilted and/or with their tips off center.
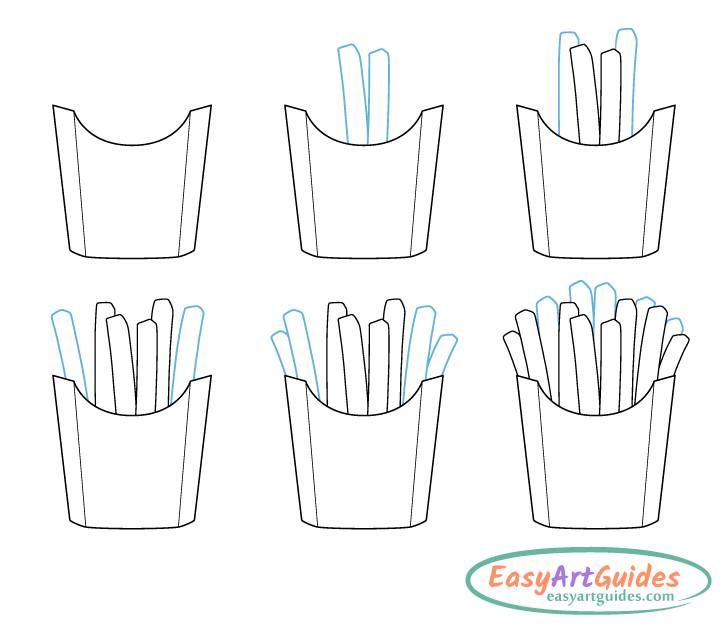
You can start adding the fry strips with those in the center and foreground (in front) and gradually add the ones to the sides and behind them (ending with those at the very back).
Generally, when fries are dumped into a container they can often be quite disorderly. However, for nicer-looking artwork you can make things more organized. Position the strips vertically and draw them in a way where the bunch fans out as they go up from the box. Also, try to keep their distribution fairly even (but not perfectly so).
Step 3 – Draw the Edges of the Fries
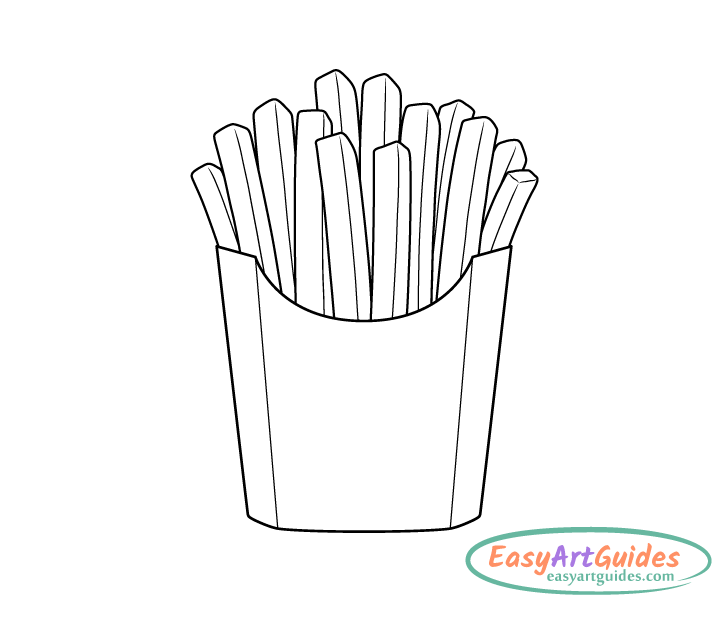
Help show the rectangular shape of the fry strips by drawing their edges.
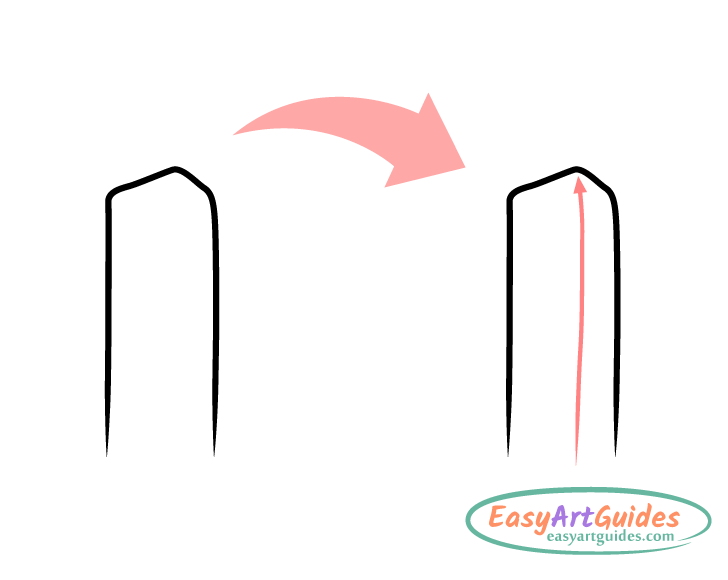
Make these run up to the tips of the “roofs” from the previous step but not actually touch them. Leaving little gaps will help create a sense of the edges being slightly rounded.
Step 4 – Draw the Design of the Fries Box
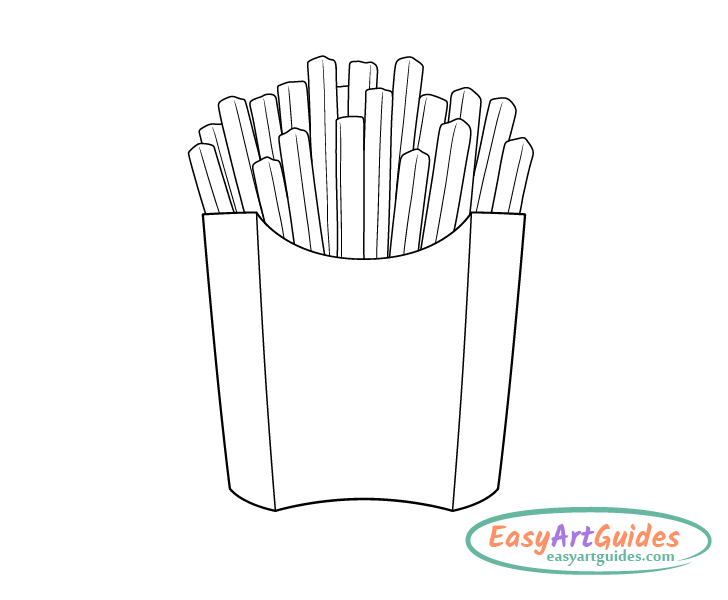
To make the drawing look a little more interesting, give the box some design elements. In this example, it’s just a strip running along its top. Draw this following the shape of the box’s upper edge. If you wish, you can also add other things such as logos or patterns.
Step 5 – Color the Fries Drawing
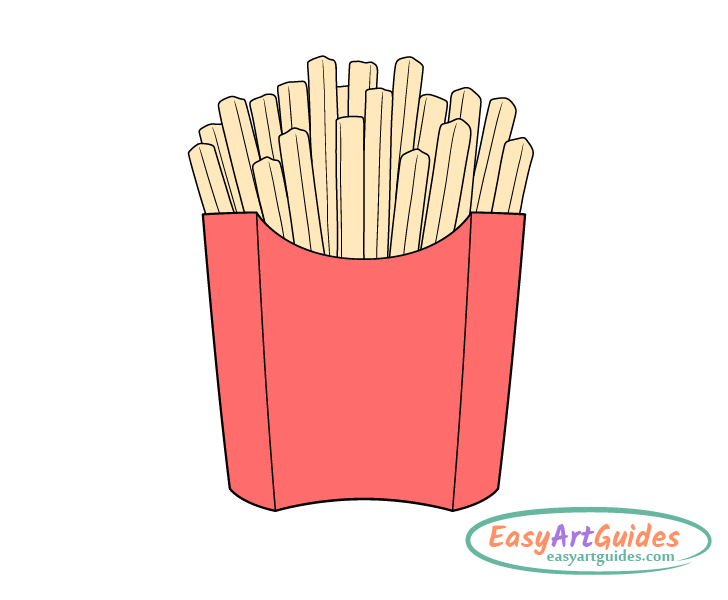
To color the drawing, make the fries a yellow-orange-brown. An easy way to create this mix is to apply the colors in layers over one another using pencil crayons.
Make the container red (or any color you like) but make its left side a slightly lighter variant of the color to show that more light is hitting that area. This will help give the box a three-dimensional appearance (especially when combined with the shadows in the next step).
You can get the lighter color variant by applying less pressure to the pencil when coloring the corresponding area.
Step 6 – Apply Shading to the Drawing
As in this example, the light is coming from the left side of the drawing; add the shadows along the right side of the box and each of the fry strips. To create the shadows on the fries, go over the color mix applied in the previous step with a darker brown (press harder on the pencil). Add the shadow on the container by going over its side with a light layer of regular pencil shading.
Conclusion
This guide shows how to draw a box of French fries. A good way to approach such a drawing is to first outline the container and then add the fries by starting with those in the foreground.
In this example, the potatoes are shown as strips and drawn to be more neatly packed into the container than you would generally see them when ordering fries at a fast-food restaurant. Sometimes making things a little neater can create nicer-looking artwork. Just don’t overdo this so that your drawings still look natural.
If you’ve enjoyed this tutorial and would like to try more similar art guides, see the following: